White labeling allows you to customize Nexus’s appearance to match your organization’s identity.Documentation Index
Fetch the complete documentation index at: https://docs.get-nexus.app/llms.txt
Use this file to discover all available pages before exploring further.
White labeling is an Enterprise Edition feature.
White Labeling Options
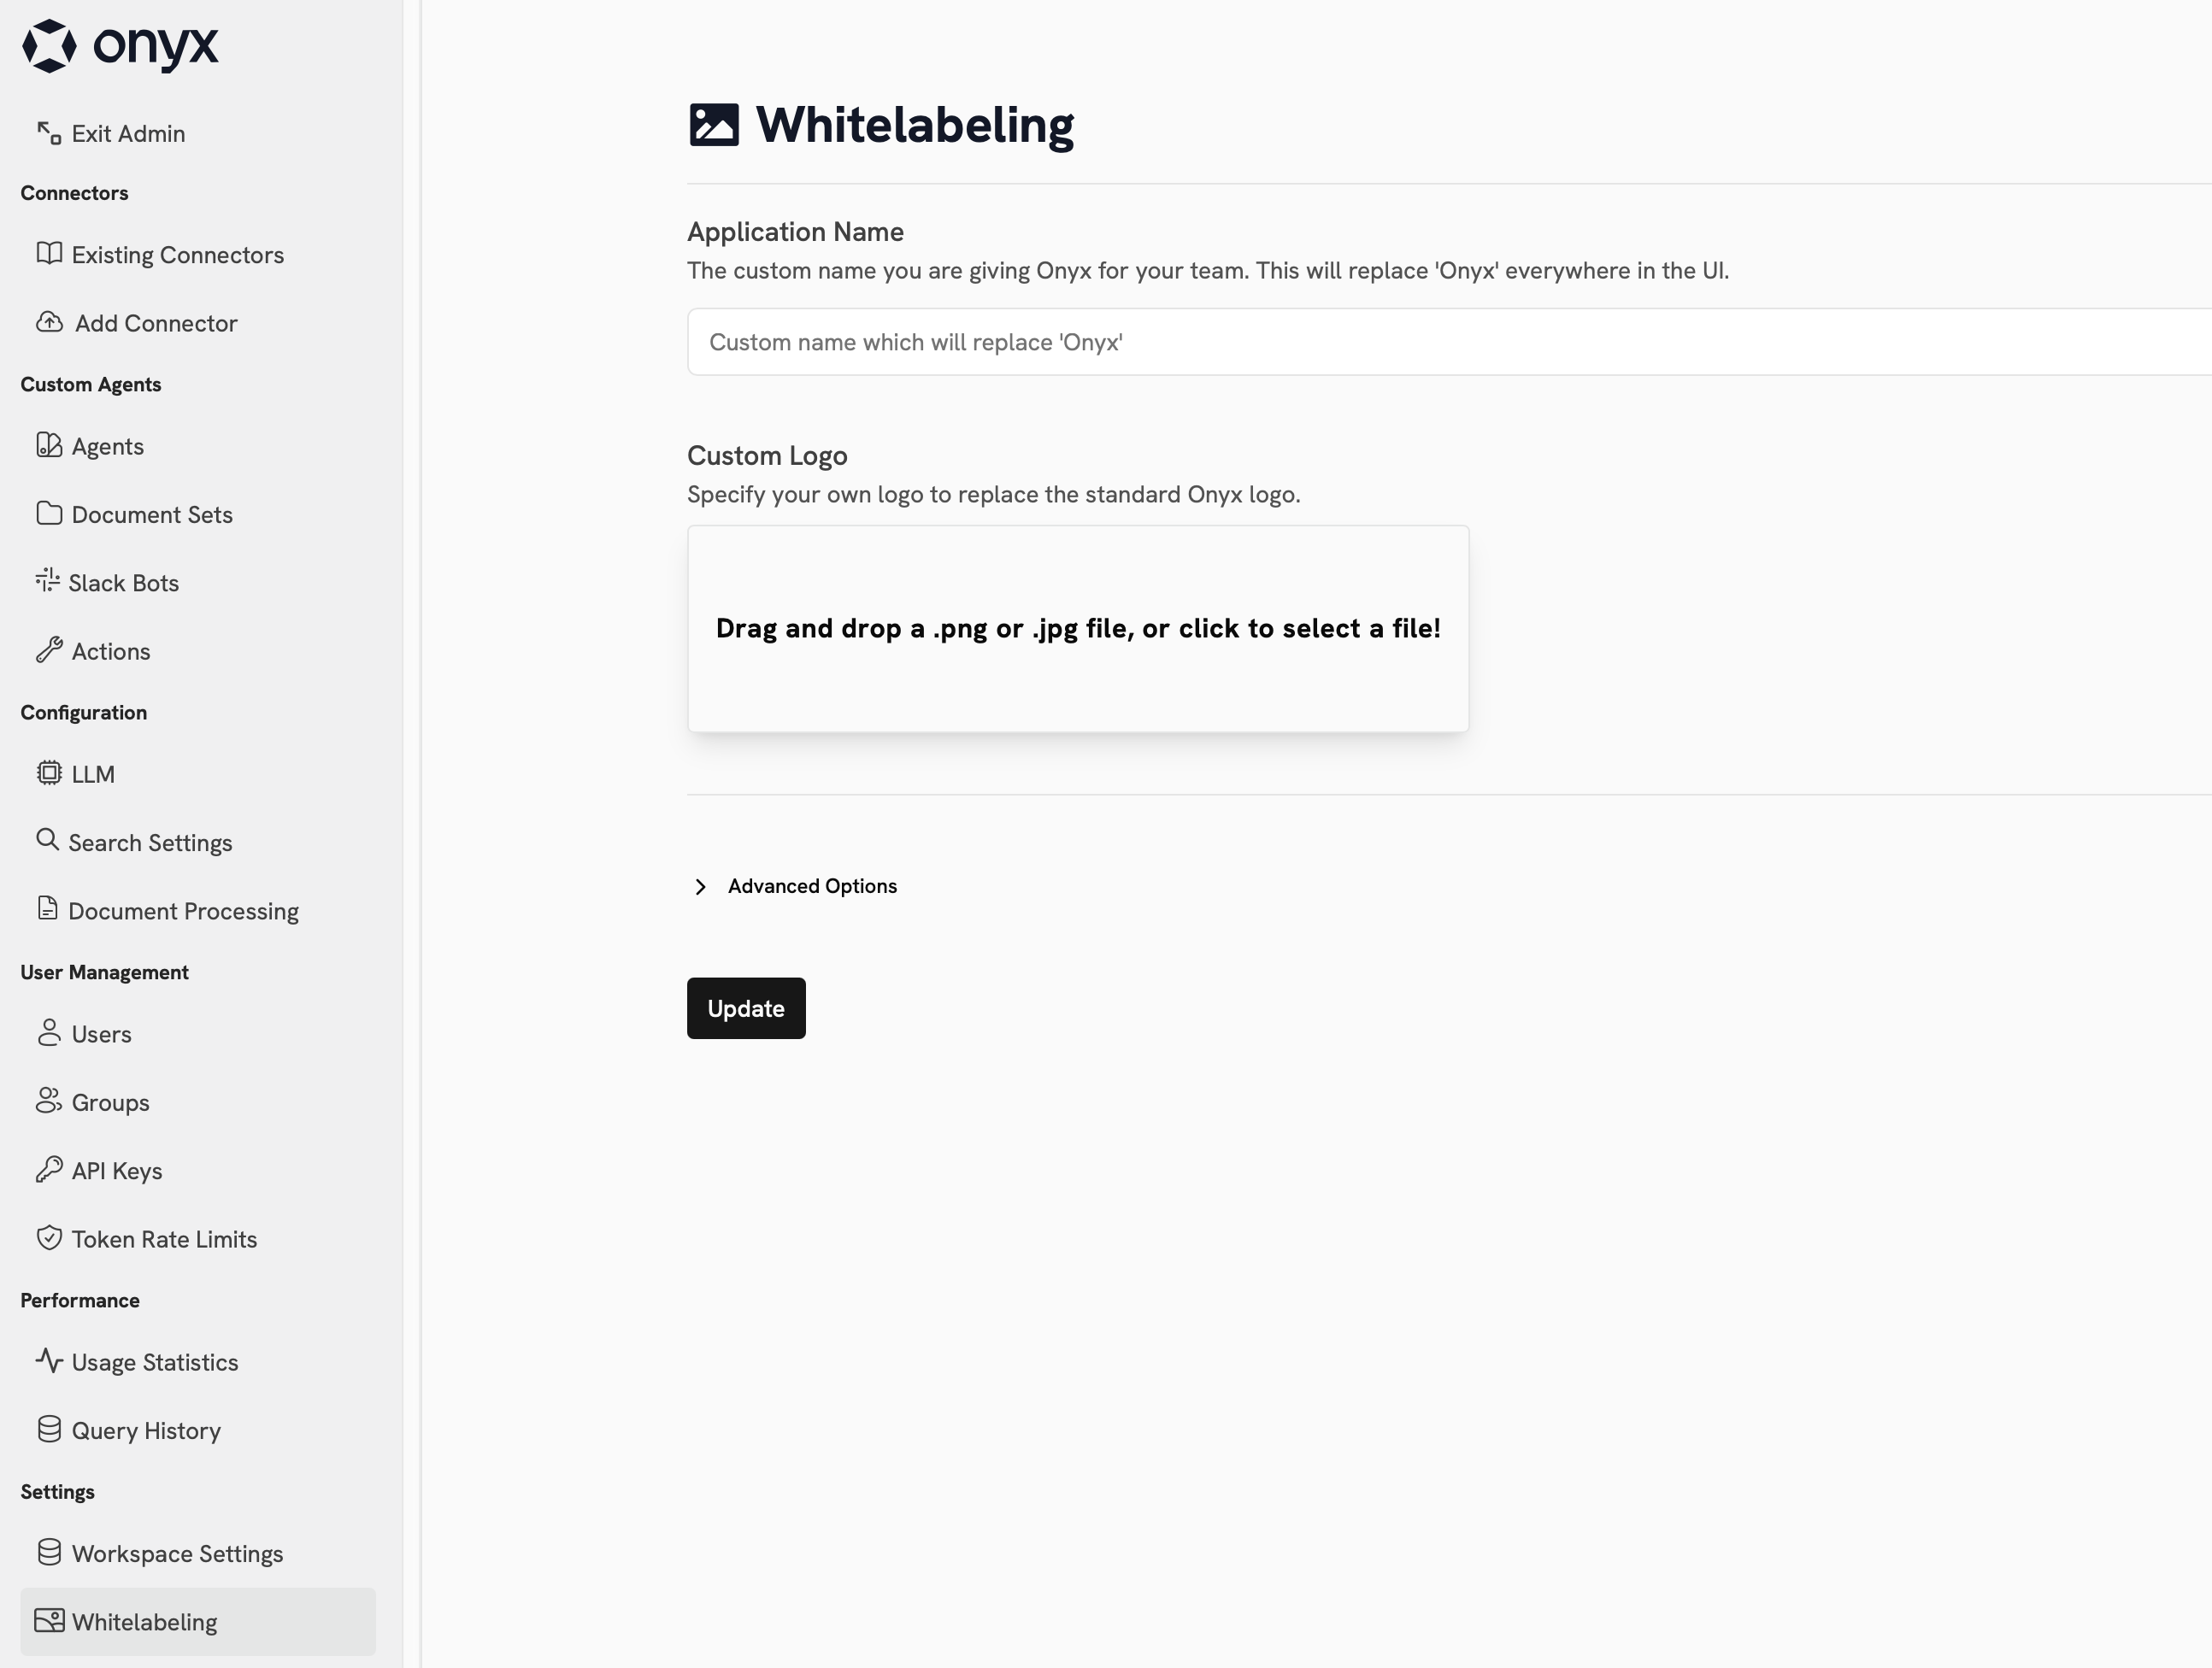
Name and Logo
Adjust the name and logo of your Nexus instance by specifying Application Name and uploading a Custom Logo. These elements change what is shown in the top left corner of the Nexus interface as well as on the login page.Headers and Popups
In the Advanced Options section, you can add content in the header as well as a custom popup window. Additionally, you can enable a Consent Screen that will be shown to users before they can access the Nexus interface.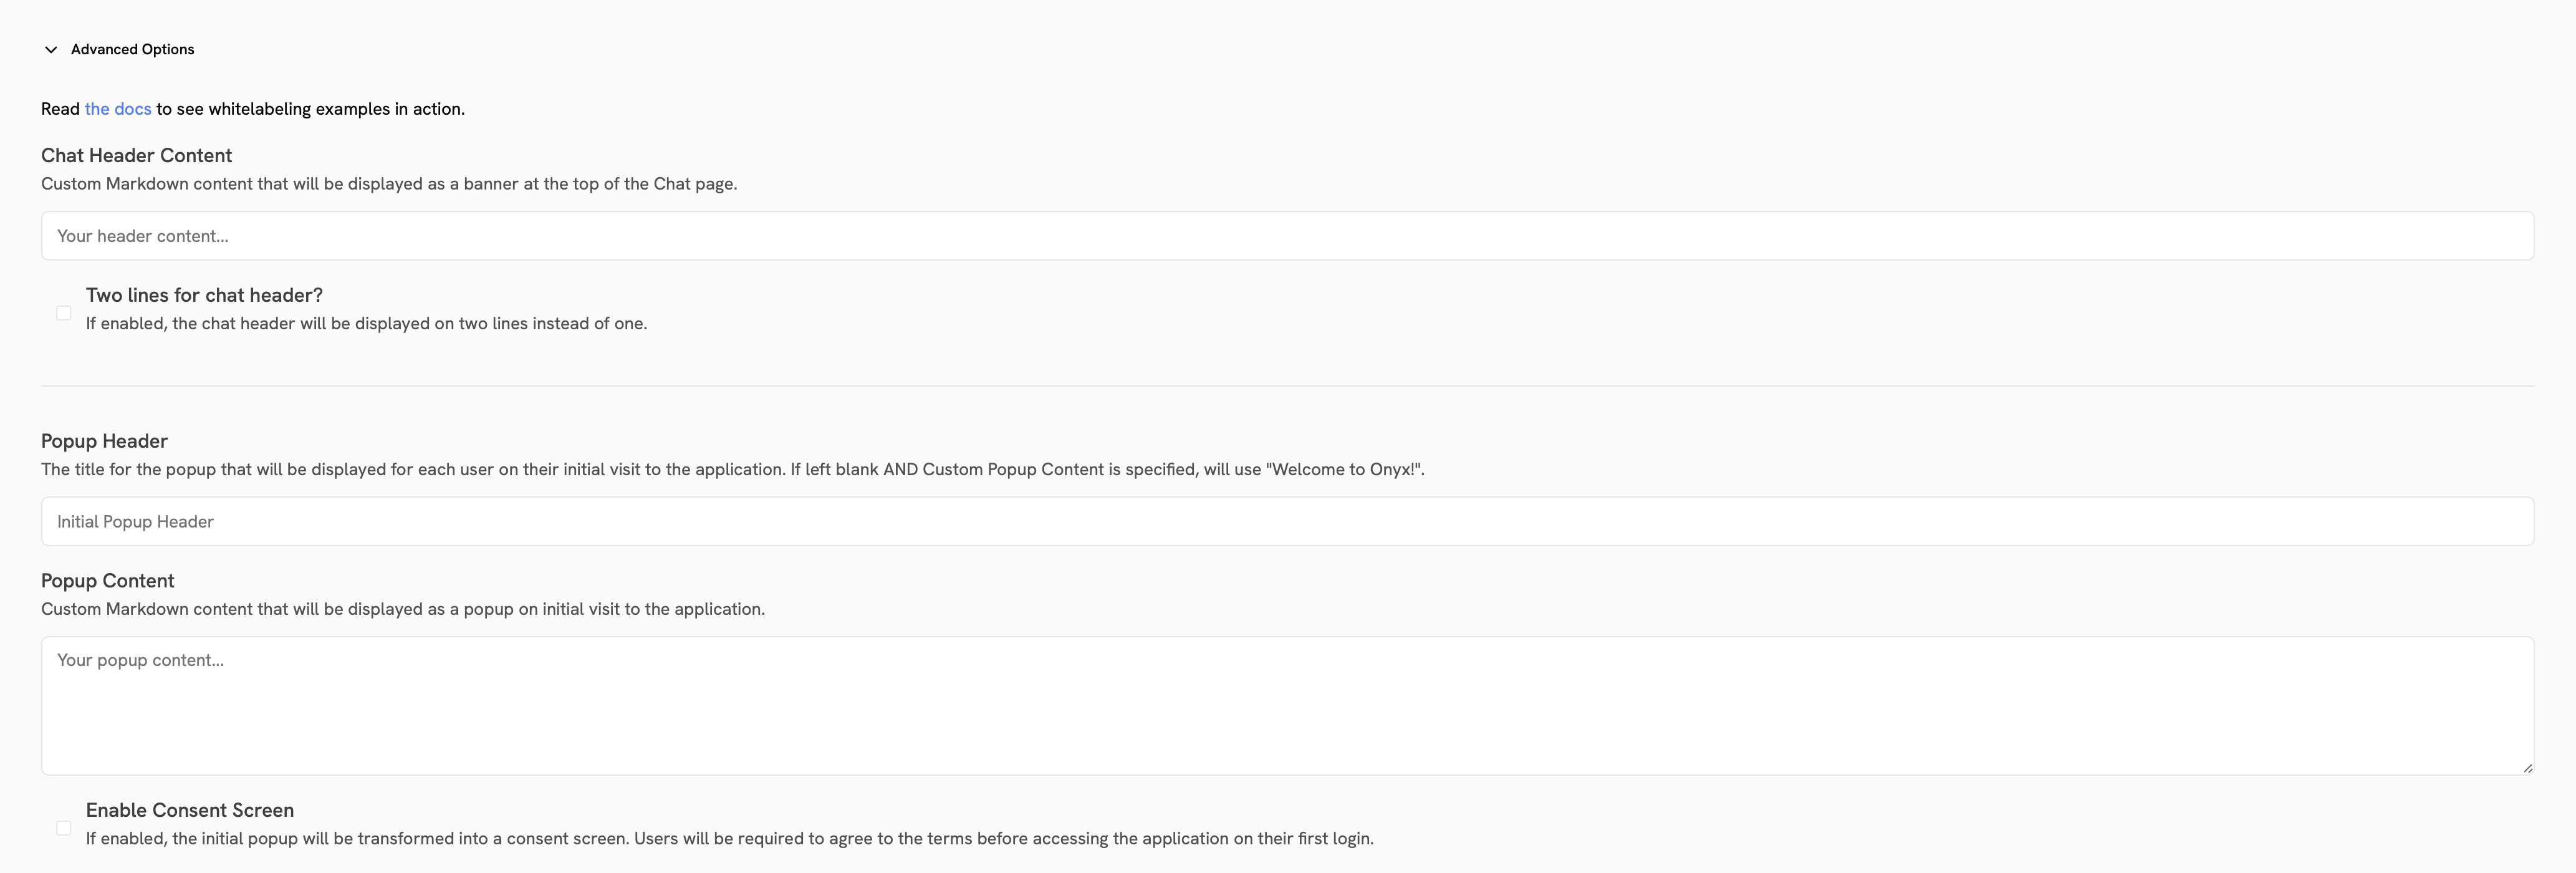
Footer
Below the Consent Screen toggle, you can add content to the footer of the Nexus interface.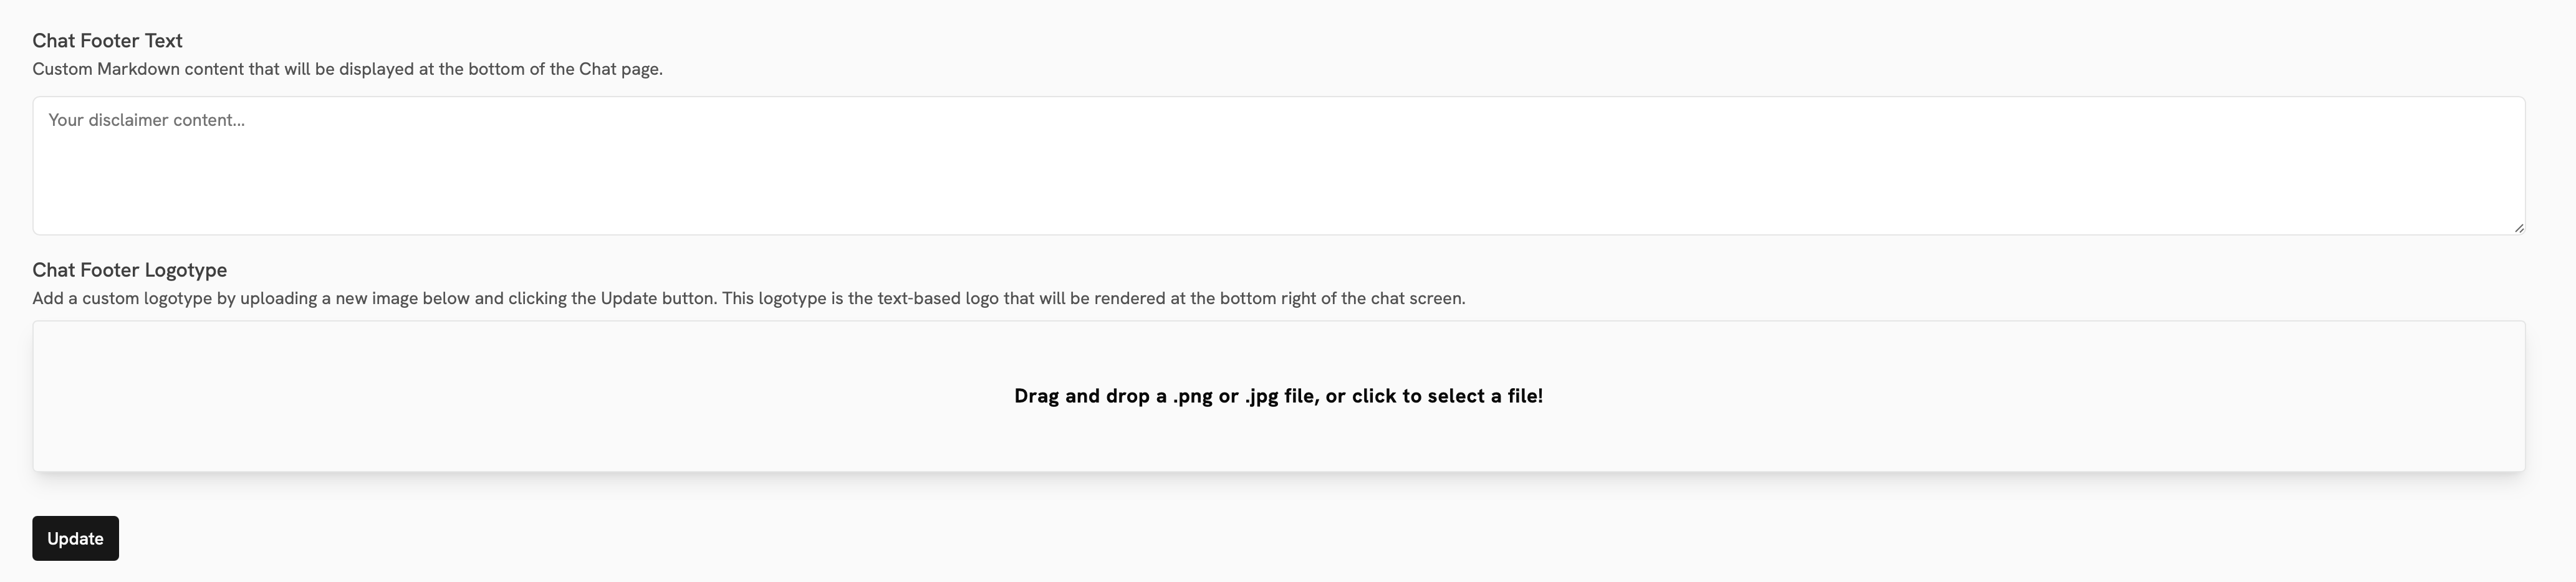
Color Theming
Nexus uses Tailwind CSS.Theme Architecture
The color system is built on two main files:web/tailwind-themes/tailwind.config.js: Base Tailwind configuration and color definitionsweb/src/app/globals.css: CSS variables for colors used in the Tailwind config
Customization Methods
Method 1: Direct CSS Variable Modification
Method 1: Direct CSS Variable Modification
Method 2: Tailwind Config Override
Method 2: Tailwind Config Override
Method 3: Organization-Specific Theme (Recommended)
Method 3: Organization-Specific Theme (Recommended)
For comprehensive theming: